Showing Posts From
Hardware


Imagine a smart home that anticipates your needs, understands complex voice commands, and recognizes your face at the door—all without sending a single byte of your personal data to a corporate server. Until recently, this level of intelligence required the massive computing power of cloud data centers. But the rapid miniaturization of neural processing units (NPUs) and the optimization of open-source models have ushered in a new era: The Edge AI Smart Home. As a robotics engineer with a background in autonomous systems, I view the home as the ultimate localized robotic environment. Relying on cloud infrastructure for critical home operations is not just a privacy risk; it's an architectural flaw. #Robotics #AutonomousVehicles In this comprehensive, step-by-step guide, we will explore how to architect, hardware-provision, and deploy a privacy-first smart home using Edge AI hubs. We will cut the cord to the cloud and bring the brain of the operation directly into your living room. #EdgeAI #IoT What is Edge AI in the Context of a Smart Home? "Edge computing" means processing data at or near the source of data generation, rather than sending it across the internet to a centralized cloud. When we add "AI" to the mix, we are talking about running machine learning models—such as computer vision for security cameras or Large Language Models (LLMs) for voice assistants—locally on hardware physically located inside your home. The Three Pillars of Edge AI Privacy:Zero Data Exfiltration: Your audio recordings, video feeds, and daily routines never leave your local area network (LAN). Infinite Uptime: Because processing is local, your voice commands and automations work flawlessly even during internet outages. Instant Latency: Processing an image or a voice command locally takes milliseconds, compared to the round-trip latency of cloud APIs.Step 1: Choosing the Right Hardware for the Hub You cannot run advanced AI models on a standard $30 smart hub. You need compute power, specifically hardware optimized for AI inference. The Entry Level: Raspberry Pi 5 with an AI Accelerator The Raspberry Pi 5 is incredibly capable, but for Edge AI, you need to pair it with an accelerator like the Google Coral USB Accelerator or a Hailo-8 M.2 module. These specialized chips (TPUs/NPUs) can perform trillions of operations per second (TOPS), making them perfect for local object detection on camera feeds. The Power User: The N100 Mini PC or Mac Mini M-Series For running local LLMs (like Llama 3 8B or Mistral) to process natural language voice commands locally, you need significant RAM and a powerful CPU/GPU. A refurbished Mac Mini M1/M2 (due to its unified memory architecture) or an Intel N100-based Mini PC running Proxmox is the sweet spot for budget-conscious edge computing in 2026. Step 2: The Operating System - Proxmox and Home Assistant OS To maximize efficiency, we will use a hypervisor. Proxmox Virtual Environment (VE) allows you to split your Mini PC into multiple isolated virtual machines (VMs). Install Proxmox on your Mini PC via a bootable USB. Deploy Home Assistant OS (HAOS) as a primary Virtual Machine. HAOS will act as the central nervous system connecting all your IoT devices.Terminal Command: HAOS Proxmox Installation Script The community has created brilliant automation scripts for this. Log into your Proxmox web shell and execute: bash -c "$(wget -qLO - https://github.com/tteck/Proxmox/raw/main/vm/haos.sh)"Follow the prompts to allocate RAM (minimum 4GB) and storage (minimum 32GB). Within minutes, your local Home Assistant instance will be running. Step 3: Local Computer Vision with Frigate NVR Cloud cameras like Ring or Nest upload your continuous video feeds to external servers, analyze them for human movement, and send you a notification. We will replace this with Frigate, an open-source Network Video Recorder (NVR) built specifically for real-time local object detection. Frigate integrates directly into Home Assistant and utilizes the Google Coral TPU (which you plugged into your Mini PC) to analyze RTSP video streams from local, offline IP cameras (like Reolink or Amcrest). Sample Frigate Configuration (frigate.yml): mqtt: host: 192.168.1.100 detectors: coral: type: edgetpu device: usb cameras: front_door: ffmpeg: inputs: - path: rtsp://admin:password@192.168.1.50:554/h264Preview_01_main roles: - detect - rtmp detect: width: 1920 height: 1080 objects: track: - person - dog - carBecause the Coral TPU runs the inference locally, the moment a person steps onto your porch, the AI detects it in milliseconds, triggers a Home Assistant automation to turn on the porch light, and sends a snapshot to your phone via an encrypted local push notification—zero cloud required. #DataSecurityStep 4: Local Voice Processing (The Holy Grail) Voice assistants are the biggest privacy offenders. To replace them, we use the Home Assistant Assist pipeline, powered by local Whisper (for Speech-to-Text) and Piper (for Text-to-Speech). If you have a powerful enough Edge Hub (like an M2 Mac Mini or a machine with an Nvidia RTX GPU), you can route the transcribed text through a local LLM using Ollama. Running Ollama locally: # Install Ollama on your Linux VM curl -fsSL https://ollama.com/install.sh | sh# Pull a lightweight, highly capable model ollama run llama3:8bBy connecting Home Assistant to your local Ollama instance via the "Extended OpenAI Conversation" integration (pointing the API URL to http://localhost:11434/v1), your home becomes truly intelligent. You don't have to say rigid commands like "Turn on living room light." You can say, "It's getting a bit dark in here, and I want to read a book." Your local Edge AI processes the intent, understands you are in the living room, realizes reading requires light, and autonomously turns on the reading lamp. Step 5: Network Isolation (VLANs) The final, and most crucial, step in a privacy-first smart home is network isolation. Even if you don't use cloud services, many cheap IoT devices (like smart plugs or Wi-Fi bulbs) have hardcoded telemetry that constantly tries to "phone home" to servers in foreign countries. You must configure your router (using pfSense, OPNsense, or Unifi) to create an IoT VLAN.Move all IoT hardware to this separate Wi-Fi network. Create a firewall rule that Blocks all traffic from the IoT VLAN to the WAN (Internet). Create a rule that allows your Home Assistant server to initiate communication with the IoT VLAN.Now, your devices are trapped. They cannot spy on you, they cannot update their firmware without your permission, and they cannot be compromised by external botnets. They exist purely to serve your local Edge AI hub. The Future is Local Building an Edge AI smart home requires more upfront effort than simply plugging in a Google Nest Hub. It requires tinkering with Docker containers, writing YAML, and managing subnets. However, the reward is absolute digital sovereignty. Your home becomes a fortress of privacy. Your automations execute with lightning speed. And you are utilizing cutting-edge neural processing technology exactly where it belongs: at the edge, serving you, and only you. Welcome to the true definition of a "Smart" Home.Have questions about hardware requirements or Proxmox setups? Let me know in the comments, and I'll help you architect your local edge server! Related InsightsAlgorithmic Sovereignty: Deconstructing the DAO Paradox in On-Chain Governance Revolutionizing Autonomous Task Execution: The Evolution of Large Action Models (LAMs) Holographic Displays: The Silent Revolution Reshaping AR/VR, 3D Visualization, and Human-Computer Interaction{ "@context": "https://schema.org", "@type": "FAQPage", "mainEntity": [ { "@type": "Question", "name": "What is the main focus of How to Set Up a Privacy-First Smart Home Using Edge AI Hubs?", "acceptedAnswer": { "@type": "Answer", "text": "Learn how to build a 100% private smart home utilizing Edge AI hubs, local LLMs, and secure hardware without relying on external cloud servers." } }, { "@type": "Question", "name": "Who authored the comprehensive guide on How to Set Up a Privacy-First Smart Home Using Edge AI Hubs?", "acceptedAnswer": { "@type": "Answer", "text": "This detailed article and its insights were carefully researched and authored by Kaan Demir." } }, { "@type": "Question", "name": "Where can I find more related content about Technology?", "acceptedAnswer": { "@type": "Answer", "text": "You can explore more articles, detailed reviews, and similar insights by browsing the Related Insights section at the bottom of this article or visiting our dedicated Technology category page." } } ] }

The Symphony of Keystrokes: The Ultimate Guide to Mechanical Keyboards There is a distinct, almost romantic rhythm to the sound of a well-tuned mechanical keyboard. It is a symphony of plastic, metal, and springs—a staccato drumbeat that accompanies the flow of thoughts onto a digital canvas. For decades, the ubiquitous, mushy rubber-dome keyboard dominated the desks of offices and homes around the world, treating typing as a purely utilitarian chore. But in recent years, a massive cultural and technological renaissance has taken place. The mechanical keyboard has returned from the annals of computing history to claim its rightful throne, captivating enthusiasts, gamers, and writers alike. #MechanicalKeyboards #TechRenaissance But what exactly is a mechanical keyboard? Why are people willing to spend hundreds, if not thousands, of dollars on a peripheral that comes free with most pre-built computers? This comprehensive guide will take you on a journey through the intricate, obsessive, and endlessly fascinating world of mechanical keyboards. Whether you are a competitive gamer looking for an edge, a programmer looking to save your fingers from fatigue, or simply an aesthetically minded desk-setup enthusiast, this guide will serve as your ultimate resource. #DeskSetup #PCGaming A Brief History: From Typewriters to Membranes and Back Again To appreciate the modern mechanical keyboard, one must briefly look back at the history of typing interfaces. The earliest typewriters were entirely mechanical marvels of levers, arms, and ink ribbons. They required immense physical force to operate but provided undeniably clear feedback. As the world transitioned to electronic computers in the mid-20th century, early terminals carried over this robust mechanical ethos. Keyboards in the 1970s and 1980s, such as the legendary IBM Model F and Model M, used incredibly complex and heavy physical switch mechanisms. They were built like tanks and cost a small fortune to manufacture. However, as the personal computing revolution exploded in the 1990s, manufacturers faced intense pressure to slash costs. The solution was the membrane and rubber-dome keyboard. By replacing dozens of individual mechanical switches with a single sheet of printed circuitry and a layer of molded rubber domes, manufacturers reduced the cost of a keyboard from a hundred dollars to mere pennies. The world embraced this cheaper alternative, and for two decades, the "mushy" typing experience became the global standard. The tactile magic of the early PC era was all but forgotten by the mainstream. #RetroTech #ComputingHistory The resurgence of mechanical keyboards began in the late 2000s and early 2010s, spearheaded almost entirely by the PC gaming community. Brands like Razer, SteelSeries, and Corsair realized that gamers needed precise, durable, and highly responsive inputs. They resurrected the Cherry MX mechanical switch—a design that had quietly survived in industrial point-of-sale systems—and wrapped it in aggressive, RGB-lit "gamer" aesthetics. Soon after, purists and typing enthusiasts splintered off from the gaming mainstream, creating the "Custom Mechanical Keyboard" community we know today. This subculture focused intensely on acoustics, premium materials, minimalist aesthetics, and the joy of DIY building. The Fundamentals: Anatomy of a Mechanical Switch To understand the appeal of mechanical keyboards, one must understand what happens beneath the keycaps. Most modern, budget-friendly keyboards use the aforementioned membrane technology. When you press a key, you collapse a rubber dome, which then pushes down on a membrane to complete an electrical circuit. This design has a fatal flaw: it offers no distinct tactile feedback until the key has "bottomed out" (hit the very bottom of the plastic housing). It feels like typing on a wet sponge. #KeyboardAnatomy #TechExplained A mechanical keyboard uses individual, self-contained physical switches beneath every single key. The classic MX-style mechanical switch is composed of four primary parts:The Housing: Divided into a top housing and a bottom housing, usually made of plastics like Nylon, Polycarbonate, or POM. The housing holds all the components together and significantly influences the switch's sound signature. The Stem: The moving plastic piece inside the switch. Its shape determines whether the switch is linear, tactile, or clicky. The top of the stem features a cross-shaped mount that holds the keycap. The Spring: A coiled metal spring that dictates the "weight" of the keystroke. Springs are measured in grams of force required to bottom out (e.g., a 62g spring vs. an 80g spring). The Contact Leaf: Two tiny pieces of metal inside the bottom housing. When the stem moves downward, it pushes the leaves together, completing the electrical circuit and registering the keystroke.This mechanism offers profound advantages. Mechanical switches are incredibly durable, often rated for 50 million to 100 million keystrokes. They offer absolute consistency, ensuring the keys feel identical year after year. Most importantly, because the actuation point (where the key registers) happens before the key bottoms out, typists can learn to strike keys with just enough force, floating over the keyboard and reducing long-term finger and wrist fatigue. #Ergonomics #TypingTips The Holy Trinity of Switches: Linear, Tactile, and Clicky If the mechanical keyboard is a musical instrument, the switches are its strings. They are the heart and soul of the typing experience. While there are hundreds of different boutique switches on the market today, almost all of them fall into three primary categories based on their feel and sound profile. #MechanicalSwitches Linear Switches Linear switches are the smoothest of the bunch. As the name implies, their travel path is a straight, uninterrupted line from top to bottom. There is no bump, no click, and no resistance other than the steady, linear pushback of the coil spring. Gamers heavily favor linear switches because the lack of a tactile bump allows for rapid, successive keystrokes without any physical friction interrupting the flow. Double-tapping keys in a fast-paced shooter feels effortless. The most famous example is the Cherry MX Red. However, the custom community has pushed the envelope far beyond basic Cherry switches. Enthusiasts now seek out boutique linear switches like the Gateron Ink Black V2, NovelKeys Cream, C³ Tangerines, and Alpaca switches. These switches are engineered with proprietary plastic blends to offer unprecedented, frictionless smoothness, especially when carefully lubricated by hand. #LinearSwitches #PCGamer Tactile Switches For software developers, copywriters, and anyone who types thousands of words a day, tactile switches are often the holy grail. Partway through the downward keypress, the stem of a tactile switch features a physical protrusion that brushes past the metal contact leaf. This creates a small, satisfying bump that you can feel in your fingertips, letting you know exactly when the keystroke has been registered. This feedback allows touch typists to stop pressing down the moment they feel the bump, preventing bottom-outs and increasing overall typing speed. The Cherry MX Brown is the quintessential entry-level tactile switch, often recommended to beginners as a middle-ground between gaming and typing. But for enthusiasts seeking a much more pronounced, sharp, and satisfying tactile event, switches like the Drop Holy Panda, Zealios V2, and Gazzew Boba U4T have become legendary gold standards. These "hyper-tactile" switches deliver a massive, rounded bump that makes typing feel incredibly rhythmic and purposeful. #TypingEnthusiast #TactileFeedback Clicky Switches Clicky switches take the tactile bump and add an intentional, audible, high-pitched "click" sound. This acoustic feedback is achieved either via a "click jacket" (a two-part plastic stem where the bottom sleeve slides down and violently snaps against the housing) or a "click bar" (a tiny metal bar stretched across the housing that gets pinged by the passing stem like a guitar string). Clicky switches offer the most sensory feedback of any switch type. You feel the sharp bump, and you hear the crisp click. The Cherry MX Blue is the most famous clicky switch, producing a nostalgic, typewriter-esque clatter. However, Kailh's Box Jade and Box Navy switches have revolutionized the clicky market with their thick click-bar mechanisms, producing a crisper, heavier, and far more satisfying acoustic signature. A crucial word of caution: clicky switches are notoriously loud. They are universally considered unacceptable for open-plan offices, quiet libraries, or shared living spaces. Bring them to work at your own peril. #ClickClack #OfficeEtiquette Beyond the Basics: Alternative Switch Technologies While the traditional MX-style mechanical switch dominates the current landscape, history and modern innovation have provided several fascinating alternative technologies that eschew traditional metal contact leaves. #VintageTech #KeyboardInnovation Buckling Springs (The IBM Legacy) No deep dive into mechanical keyboards is complete without paying respect to the grandfather of them all: the IBM Model M. Introduced in the 1980s, this massive, indestructible beige behemoth used patented "buckling spring" technology. Beneath each keycap sits a long coil spring. When pressed, the spring compresses until it literally buckles and folds outward, violently striking the side of the plastic barrel and completing a capacitive or membrane circuit below. This buckling action creates a massive, resonant metallic "PING" and a sharp, incredibly heavy tactile bump. It is a legendary, aggressive typing experience that many purists argue has never been surpassed by modern plastics. Topre (Electro-Capacitive) Hailing from Japan, Topre switches are a fascinating, highly premium hybrid. They utilize a rubber dome, but not in the cheap, mushy way budget keyboards do. Beneath a high-quality, perfectly tuned rubber dome sits a conical metal spring over a printed circuit board. As you press the key, the dome collapses (providing a beautifully rounded tactile bump), and the coil spring compresses. The PCB reads the change in capacitance generated by the spring's proximity and registers the keystroke well before the key bottoms out. Topre switches offer a deeply satisfying, thumping "thock" sound and a pillowy feel that is often described as typing on rain drops. Keyboards featuring Topre switches, such as the Happy Hacking Keyboard (HHKB) and Realforce lines, are extremely expensive but possess a fiercely loyal cult following. #Topre #HHKB Optical and Hall Effect Switches Modern competitive gaming has driven innovation toward hyper-fast response times and absolute durability. Optical switches eliminate metal contacts entirely, instead using a beam of infrared light inside the switch housing. When the stem moves down, it breaks (or allows) the light beam, instantly registering the key at the speed of light. Because there are no physical metal leaves to bounce against each other, optical switches don't require software "debouncing" algorithms, reducing input latency. Even more revolutionary are Hall Effect switches, like those utilized by Wooting and SteelSeries. These switches use magnets embedded in the stem and sensors on the PCB to measure the exact, analog distance the key has traveled in real-time. This allows users to dynamically set custom actuation points via software. You can set your WASD keys to an ultra-sensitive 0.1mm actuation for split-second strafing in a shooter, and your typing keys to a deeper 2.0mm actuation to prevent typos. It even enables true analog input, where pressing a key halfway makes a game character walk, and pressing it fully makes them sprint, much like the analog stick on a console controller. #GamingTech #HallEffect Form Factors: How Many Keys Do You Really Need? When you picture a keyboard, you likely visualize a standard "Full-Size" board with 104 or 108 keys. This includes the alphanumeric cluster, a function row (F1-F12), navigation keys (Home, End, Page Up), arrow keys, and a dedicated number pad on the far right. But in the mechanical keyboard world, bigger is rarely considered better. Removing rarely used keys frees up valuable desk real estate, allows you to bring your mouse closer to the center of your body for superior ergonomics, and vastly improves the aesthetic balance of a desk setup. #Ergonomics #Minimalism #DeskSetupTenkeyless (TKL / 80%): The most popular alternative layout. It simply chops off the number pad on the right side, leaving the arrow keys and navigation cluster perfectly intact. This is the ideal layout for gamers who need more sweeping space for their mouse but cannot live without dedicated arrow and function keys. 75%: A slightly more compact evolution of the TKL. It retains the function row and arrow keys but squishes everything together into a single, contiguous block without any gaps, saving an extra inch or two of width. 65%: The function row is completely removed, relegated to a secondary "layer" accessed by holding a "Fn" key (pressing Fn + 1 outputs F1). Dedicated arrow keys and a vertical column of essential navigation keys (like Delete and Page Up) remain. This is widely considered the perfect sweet spot for enthusiasts. 60%: The true minimalist standard. No function row, no number pad, no navigation cluster, and no dedicated arrow keys. Everything outside the alphanumeric cluster and modifiers is accessed via layers. It is highly portable, perfectly symmetrical, and incredibly popular among hardcore custom builders. 40% and Ortholinear: The extreme, uncompromising end of the spectrum. These tiny keyboards strip away the number row entirely, leaving only letters and a few modifiers. Typists use complex "chords" and multiple deeply programmed layers to type numbers and symbols. Furthermore, many of these boards are "Ortholinear," meaning the keys are aligned in a perfect, un-staggered grid. Proponents argue this vertical alignment is vastly superior for finger ergonomics, as it mimics the natural curling motion of the human hand rather than the slanted stagger inherited from mechanical typewriters. #Ortholinear #CustomLayoutsKeycaps: The Crown Jewels of Customization A keyboard's switches dictate how it feels, but its keycaps dictate how it looks and, to a surprisingly massive extent, how it sounds. Upgrading keycaps is the easiest and most profound visual transformation you can apply to a keyboard. #Keycaps #CustomPC The Plastics: ABS, PBT, and Beyond Keycaps are almost exclusively injection-molded from two types of plastic: Acrylonitrile Butadiene Styrene (ABS) and Polybutylene Terephthalate (PBT). ABS is the standard plastic used on almost all mass-market consumer keyboards. It is relatively cheap, easy to mold perfectly, and allows for extremely vibrant, saturated colors. However, ABS has a significant downside for typists: it degrades and wears quickly. Over time, the mild friction and natural oils from your fingertips polish the surface of the plastic, causing the keycaps to develop an unappealing, greasy-looking "shine." PBT is the discerning enthusiast's plastic of choice. It is a denser, vastly harder plastic that strongly resists finger oils and almost never develops a shine, even after years of heavy use. PBT keycaps typically feature a slightly textured, matte, sandy feel and produce a deeper, lower-pitched, "bassier" sound when struck. While PBT historically struggled to hold bright colors without warping during manufacturing, modern techniques have largely closed the color-vibrancy gap. In recent years, experimental materials have entered the fray. POM (Polyoxymethylene) keycaps offer a slick, buttery feel, while boutique artisan manufacturers have even produced entire keycap sets cast out of cold, heavy Ceramic, offering an acoustic signature unlike anything else on earth. The Legends: Double-Shot vs. Dye-Sublimation How the letters and symbols (the "legends") are applied to the keycaps is just as important as the material. Cheap, mass-market keyboards use pad printing or laser etching. These methods essentially paint the letters onto the surface, meaning they will inevitably chip, fade, and wear off entirely with heavy use, leaving you with blank plastic nubs. High-end enthusiast keycaps utilize two premium manufacturing methods to ensure the legends last forever. Double-shot injection molding is an incredibly complex process where the inner legend is molded out of one color of plastic, and then the outer shell of the keycap is molded entirely around it in a second color. Because the legend is a physical, three-dimensional piece of plastic running all the way through the cap, it is literally impossible for it to ever wear away. Dye-sublimation (Dye-Sub) is a process used primarily on PBT keycaps where intense heat is used to vaporize ink, sinking it deep into the molecular structure of the plastic itself, staining it permanently rather than resting on top. Both methods ensure that your keyboard will look pristine for decades to come. #Design #Engineering The Profiles: Sculpting the Typing Experience Keycaps are not perfectly flat cubes. They are sculpted into different vertical "profiles" designed to cradle your fingers and reduce reaching. The OEM profile is standard on most pre-built boards, featuring a medium height and a cylindrical top row angled toward the user. The legendary "Cherry" profile is similar but slightly lower in height, and is universally beloved by enthusiasts for its supreme comfort and fast typing angle. For those who love vintage aesthetics, high-profile sets like SA (Spherical All) and MT3 dominate the market. These towering, retro-looking keycaps feature deep, bowl-like spherical indents on the top that violently hug your fingertips. Because of the massive amount of empty plastic space inside them, high-profile caps act like acoustic echo chambers, producing a massive, cavernous, booming "thock" sound. Conversely, flat, "uniform" profiles like DSA and XDA feature all rows at the exact same height and angle. While some find them less ergonomic, their uniformity makes them incredibly versatile for mixing and matching keycaps across bizarre custom layouts like 40% and split ergonomic boards. Case Materials, Plates, and Mounting Styles Once you step past entry-level keyboards, the chassis (or case) itself becomes a primary focus of engineering. Budget keyboards use cheap, hollow, injection-molded ABS plastic cases that rattle and amplify high-pitched pinging noises. Premium custom keyboards are precision CNC-milled from massive, solid blocks of aircraft-grade 6063 Aluminum, Polycarbonate (for a frosted, translucent look that diffuses RGB lighting beautifully), or even solid brass and exotic woods. A heavy, dense case absorbs harsh vibrations and anchors the keyboard to the desk, creating a premium, luxurious heft. Inside the case sits the "Plate," the rigid sheet that holds the switches in place above the PCB. The material of the plate drastically changes the typing feel. Aluminum is the standard, offering a stiff, bright typing experience. Brass plates are incredibly rigid and produce a high-pitched, musical bottom-out sound. Polycarbonate and POM plates are soft and flexible, offering a bouncy, forgiving typing feel that reduces finger fatigue. FR4 (the same fiberglass material used to make PCBs) offers a highly desirable middle-ground: softer than aluminum, but crisper than polycarbonate. How the plate and PCB are mounted to the external case—the "Mounting Style"—is the deepest rabbit hole in modern keyboard design. Tray Mount: The oldest and cheapest method. The PCB is screwed directly into standoffs at the bottom of the case. This creates an uneven, stiff typing feel, as keys near the screws are rock hard, while keys in the middle flex. Top Mount: The plate features tabs that are screwed into the top frame of the case. This offers a much more consistent, even typing feel and a clean sound profile. Gasket Mount: The current industry obsession. The plate is sandwiched between the top and bottom case using thick strips of poron foam, silicone, or rubber gaskets. The plate and PCB never touch the hard metal of the case directly. This isolates vibrations and creates a remarkably soft, bouncy, and acoustically muted typing experience that is highly sought after. #KeyboardBuild #DIYThe Art of Tuning: Lubing, Filming, and Modding For the true mechanical keyboard enthusiast, simply buying expensive parts and snapping them together is not enough. A keyboard is not finished until it has been meticulously tuned. This is where the hobby transcends mere consumerism and becomes an exercise in obsessive craftsmanship. #Modding #DIYProject The single most impactful modification one can perform is switch lubrication. Using tiny paintbrushes and highly specialized, expensive industrial lubricants like Krytox 205g0 or TriboSys 3203, enthusiasts painstakingly open each individual switch and coat the internal friction points—the stem rails, the spring, and the bottom housing. This intensely tedious process, which can easily take three to four hours for a single keyboard, completely transforms the switch. It eliminates the scratchy acoustic sound of plastic rubbing against plastic, entirely kills metallic spring "ping," and makes the keystroke feel as smooth as gliding on warm glass. Many builders also add "Switch Films"—paper-thin gaskets placed between the top and bottom housing of the switch—to eliminate any microscopic wobble and tighten the sound profile. Stabilizers—the wire mechanisms that keep long keys like the Spacebar, Shift, and Enter key from wobbling left to right—also require immense attention. An un-tuned spacebar produces a horrific, high-pitched rattling noise that can ruin the acoustic profile of an entire $500 keyboard. Enthusiasts will "clip" the plastic feet off the stabilizer stems to make them strike the PCB perfectly flat. They will heavily lubricate the metal wire with thick dielectric grease (or specialized Krytox XHT-BDZ) to eliminate metal-on-plastic rattle. They may even perform the "Holee Mod"—inserting tiny, microscopic strips of medical fabric tape inside the stabilizer stem to completely cushion the wire. Furthermore, acoustic dampening has become an esoteric art form. Builders pour liquid silicone into the bottom of their cases to add weight and kill hollowness. They carefully cut and layer dense neoprene, Poron foam, or even PE foam (the packing material) directly under the switches to manipulate the acoustics. A popular and highly accessible trick is the "Tape Mod," which involves covering the entire back of the PCB in layers of blue painter's tape. The tape acts as an acoustic low-pass filter, absorbing high-pitched pings and accentuating a deep, creamy, "marbly" sound signature that has taken platforms like YouTube and TikTok by storm. #SoundDesign #Thock #Marbly The Custom Community and the Group Buy Ecosystem If you want to enter the highest echelons of this hobby, you cannot simply log onto Amazon and add a premium custom keyboard to your digital cart. The high-end, boutique market operates almost entirely on a crowdfunding model known as the "Group Buy." #Community #GroupBuy Because boutique keyboard cases and custom keycap sets require massive upfront manufacturing and tooling costs, independent designers must crowdsource the funding. A designer will create highly detailed 3D renders of a keyboard or keycap set and run an "Interest Check" (IC) on community forums like Geekhack, KeebTalk, or the massive /r/MechanicalKeyboards subreddit. If there is enough community interest and feedback, the Group Buy officially opens for a window of a few weeks, allowing people to pre-order. Once the Group Buy closes, the collected funds are sent to overseas manufacturers. Because these are highly complex, low-volume manufacturing runs requiring strict color-matching and quality control, the wait times are substantial. Waiting six to twelve months for a milled aluminum keyboard case, or up to two years for a highly sought-after GMK double-shot ABS keycap set, is considered entirely normal in this hobby. It requires immense patience and trust, but the ultimate reward is a piece of functional, bespoke art that is entirely unique, highly personalized, and built to incredibly exacting standards that mass-market brands simply cannot replicate. The Artisan Touch No custom board is truly finished without the addition of an artisan keycap. These are singular, custom-made keycaps—usually placed on the Escape key or in the top right corner of the board—that serve as a focal point of intense artistic expression. Hand-sculpted from clay and painstakingly cast in multicolored resin, or intricately CNC-machined from exotic metals like titanium and copper, artisan keycaps are the ultimate flex in the keyboard world. They can resemble anything from menacing demonic skulls and cute animals, to incredibly detailed miniature dioramas containing tiny snow-capped mountains or koi ponds suspended in clear, polished resin. They are highly collectible, strictly limited in production, and often sold exclusively via random-draw "raffle" sales. A highly coveted artisan keycap from makers like Keyforge, Artkey, or GAF can easily fetch hundreds, or even thousands, of dollars on the aftermarket. #ArtisanKeycaps #FunctionalArt Conclusion: A Tactile Revelation Diving headfirst into the world of mechanical keyboards can be overwhelming. The endless sea of acronyms, the esoteric switch names, the fierce debates over mounting styles, and the agonizing wait times of group buys can seem entirely absurd to an outsider. Why on earth would anyone put so much effort, time, and money into a device whose sole, basic purpose is to input text into a computer? The answer is surprisingly simple: because we touch our keyboards more than almost any other object in our modern lives. For software developers, writers, data entry clerks, and dedicated gamers, the keyboard is the primary interface between the physical human mind and the digital realm. It is the tool through which we work, play, create, and communicate. To upgrade from a cheap, mushy, unsatisfying rubber dome to a bespoke, heavy, perfectly tuned mechanical keyboard is to profoundly elevate the mundane. It transforms every email you send, every line of code you compile, and every late-night gaming session from a repetitive chore into a deeply satisfying, tactile, and auditory experience. A custom mechanical keyboard is not just a computer peripheral; it is an instrument. It is a testament to the belief that the tools we use every single day should be beautiful, durable, and an absolute joy to interact with. So take the plunge, do your research, find your perfect switch, and discover the symphony of keystrokes waiting at your fingertips. Your hands will thank you. #KeyboardBuild #TechEnthusiast #MechanicalKeyboards #MechanicalKeyboards #Tech #Typing #Gaming Related InsightsThe Robotics & Autonomous Systems Engineer: Architecting the Future of Intelligent Machines Fusing the Senses: The Integration of LiDAR and Computer Vision in Level 4 Autonomy Digital Twins in Precision Medicine: Real-Time Health Monitoring and Adaptive Therapy{ "@context": "https://schema.org", "@type": "FAQPage", "mainEntity": [ { "@type": "Question", "name": "What is the main focus of The Symphony of Keystrokes: The Ultimate Guide to Mechanical Keyboards?", "acceptedAnswer": { "@type": "Answer", "text": "Discover the captivating world of mechanical keyboards. From switch types and keycap profiles to the intricate art of custom building and tuning, explore why the click-clack revolution is here to stay." } }, { "@type": "Question", "name": "Who authored the comprehensive guide on The Symphony of Keystrokes: The Ultimate Guide to Mechanical Keyboards?", "acceptedAnswer": { "@type": "Answer", "text": "This detailed article and its insights were carefully researched and authored by John Doe." } }, { "@type": "Question", "name": "Where can I find more related content about Technology?", "acceptedAnswer": { "@type": "Answer", "text": "You can explore more articles, detailed reviews, and similar insights by browsing the Related Insights section at the bottom of this article or visiting our dedicated Technology category page." } } ] }
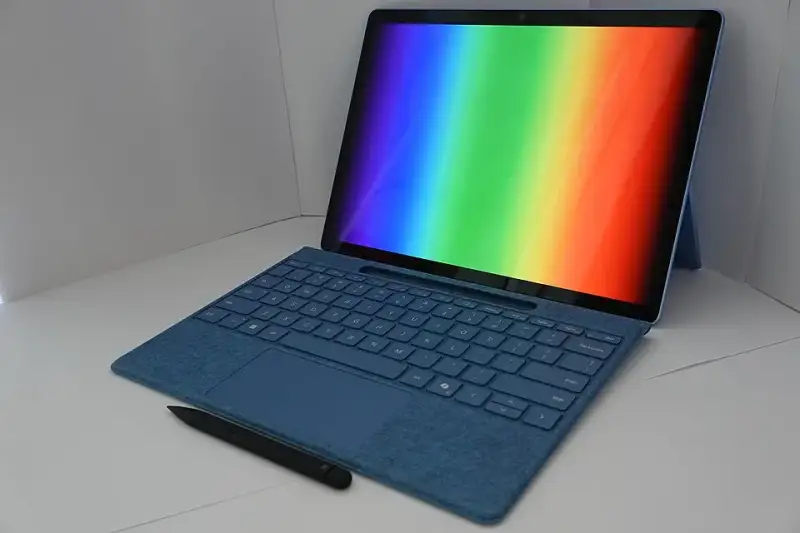
The Future is Illuminating: A Deep Dive into OLED Technology When you hold your smartphone in the palm of your hand, you are likely looking at a technological marvel that has taken decades to perfect. The deep, inky blacks, the vibrant, almost surreal colors, and the incredibly thin profile of the screen—these are all hallmarks of a display technology that has fundamentally changed the way we interact with our digital world. This is the magic of OLED, or Organic Light-Emitting Diode technology. #OLED #TechTrends For many years, the display market was dominated by Cathode Ray Tubes (CRTs) and, later, Liquid Crystal Displays (LCDs). While these technologies served us well, they had their inherent limitations. CRTs were bulky and heavy, while LCDs required a backlight to function, which meant they could never truly achieve perfect black levels. Enter OLED, a technology that essentially allows each individual pixel to generate its own light. This simple yet profound difference has paved the way for screens that are thinner, lighter, and more flexible than ever before. #DisplayTech #Innovation But what exactly is an OLED? How does it work on a microscopic level? And what does the future hold for this glowing revolution? In this comprehensive exploration, we will dive deep into the fascinating world of OLED technology, unraveling its complexities, celebrating its triumphs, and examining the challenges it faces as it continues to evolve. Whether you are a tech enthusiast, a gadget aficionado, or simply someone curious about the screen you stare at every day, this journey will shed light on the brilliant science behind the pixels. Unraveling the Acronym: What is an OLED? To understand OLED, we must first break down the acronym. OLED stands for Organic Light-Emitting Diode. Let us take this piece by piece. A diode is a basic electronic component that allows electrical current to flow in only one direction. A light-emitting diode (LED) is a specific type of diode that emits light when an electric current passes through it. #Electronics #LED The crucial word in OLED is "Organic." In chemistry, the term "organic" refers to compounds that contain carbon molecules. Therefore, an Organic Light-Emitting Diode is an LED in which the emissive electroluminescent layer is a film of organic compound that emits light in response to an electric current. This layer of organic semiconductor is situated between two electrodes; typically, at least one of these electrodes is transparent so that the light can escape and be seen by the human eye. The concept of electroluminescence—the phenomenon where a material emits light in response to the passage of an electric current—is not new. It was first observed in the early 20th century. However, the specific application of organic materials for this purpose was pioneered much later. In the 1950s, researchers began experimenting with organic compounds, but it wasn't until the late 1980s that significant breakthroughs were made. Scientists at Eastman Kodak developed the first practical OLED device in 1987, utilizing a novel two-layer structure that significantly reduced the operating voltage and improved efficiency. #ScienceHistory #TechInnovation This breakthrough laid the foundation for the commercialization of OLED technology. Unlike traditional LEDs, which are typically made from inorganic semiconductor materials like gallium arsenide or gallium phosphide, OLEDs utilize thin films of organic molecules or polymers. These materials can be deposited on a variety of substrates, including flexible plastics, which is what gives OLED its unique advantages in form factor and design. #MaterialScience The Inner Workings: Anatomy of an OLED To truly appreciate the brilliance of OLED technology, we must zoom in and examine its microscopic anatomy. An OLED is essentially a multi-layered sandwich, with each layer playing a critical role in the generation of light. Let us dissect this sandwich layer by layer. #TechExplained #EngineeringThe Substrate: This is the foundation of the OLED. It provides structural support for the entire device. In traditional displays, the substrate is typically made of rigid glass. However, one of the most exciting aspects of OLED technology is its compatibility with flexible substrates, such as clear plastic or metal foil. This allows for the creation of bendable, rollable, and foldable screens. #FlexibleDisplaysThe Anode (Positive Terminal): The anode is typically made of a transparent material, such as Indium Tin Oxide (ITO). When an electrical current flows through the device, the anode removes electrons (adds electron "holes") to the organic molecules it is in contact with. Transparency is key here, as it allows the light generated within the device to pass through and reach the viewer.The Organic Layers: This is where the magic happens. Early OLEDs used a simple two-layer organic structure, but modern devices often employ multiple layers to improve efficiency and performance. These layers are extremely thin—often thousands of times thinner than a human hair. They are typically composed of:The Hole Injection Layer (HIL) and Hole Transport Layer (HTL): These layers facilitate the movement of positive charges (holes) from the anode toward the emissive layer. The Emissive Layer: This is the heart of the OLED. It is made of organic plastic molecules that transport electrons from the cathode. This is where light is actually produced. Different organic molecules are used to produce different colors of light (red, green, and blue). #ColorScience The Electron Transport Layer (ETL) and Electron Injection Layer (EIL): These layers facilitate the movement of electrons from the cathode toward the emissive layer.The Cathode (Negative Terminal): Depending on the type of OLED, the cathode may or may not be transparent. Its primary function is to inject electrons into the organic layers when a current is applied. Common materials used for the cathode include metals like barium, calcium, or aluminum. #ChemistrySo, how do these layers work together to create light? When a voltage is applied across the OLED, electrical current flows from the cathode to the anode. The cathode injects electrons into the emissive layer, while the anode removes electrons (injects holes) from the conductive layer. These electrons and holes move towards each other due to electrostatic forces. When an electron and a hole meet in the emissive layer, they combine to form an exciton—a bound state of an electron and a hole. This recombination process releases energy in the form of a photon, which we perceive as visible light. The color of the light depends on the specific type of organic molecule used in the emissive layer. By carefully selecting and tuning these molecules, manufacturers can create OLEDs that emit pure, vibrant reds, greens, and blues, which can then be combined to produce any color in the visible spectrum. #Physics #Optics The Clear Advantages: Why OLED Triumphs Over LCD For many years, LCD (Liquid Crystal Display) technology, particularly when backed by LED lighting (often confusingly marketed simply as "LED TVs"), has been the standard for televisions, monitors, and smartphones. However, OLED offers several distinct advantages that have allowed it to challenge and, in many high-end applications, supersede LCD technology. #OLEDvsLCD #TechBattle 1. Perfect Blacks and Infinite Contrast Perhaps the most celebrated advantage of OLED is its ability to produce true, perfect blacks. In an LCD panel, a backlight illuminates the entire screen (or large zones of it). Liquid crystals act as shutters, blocking the light where black is needed. However, these shutters are never perfectly opaque; some light always bleeds through, resulting in a dark gray rather than a true black. In contrast, OLED pixels are self-emissive. Each pixel generates its own light. When a pixel needs to display black, it simply turns off completely. No light is emitted, resulting in an absolute, ink-like black. This ability to completely shut down individual pixels gives OLED displays an effectively infinite contrast ratio—the difference between the brightest white and the darkest black. This unparalleled contrast produces images with incredible depth, "pop," and realism that LCDs simply cannot match. #VisualQuality #HomeTheater 2. Superior Viewing Angles If you have ever looked at an older LCD screen from the side, you have likely noticed a degradation in color and brightness. This is due to the way liquid crystals manipulate light. OLED displays do not suffer from this limitation. Because the pixels themselves emit light in all directions, the picture quality remains remarkably consistent, even at extreme viewing angles. This makes OLED an excellent choice for large living room TVs where multiple people may be watching from different positions. 3. Faster Response Times Response time refers to how quickly a pixel can change from one state to another (e.g., from gray to white and back to gray). LCD pixels rely on the physical twisting and untwisting of liquid crystals, a mechanical process that takes time. While modern LCDs have significantly improved, they can still struggle with fast-moving content, resulting in motion blur or ghosting. OLED pixels, on the other hand, change state almost instantaneously through electrical stimulation of the organic compounds. This results in incredibly fast response times—often measured in microseconds rather than milliseconds. This rapid response makes OLED displays exceptionally well-suited for fast-paced action movies, sports broadcasting, and high-framerate competitive gaming. #GamingMonitor #Esports 4. Thinner, Lighter, and Flexible Form Factors Because OLED displays do not require a bulky backlight assembly or complex liquid crystal matrices, they can be manufactured to be astonishingly thin and light. Some OLED TVs are literally as thin as a pane of glass. Furthermore, as mentioned earlier, the organic materials used in OLEDs can be deposited on flexible substrates like plastic. This has opened the door to entirely new form factors that were previously impossible. We now have smartphones with screens that fold in half, televisions that roll up into a discrete box when not in use, and curved displays that wrap around the dashboard of a car. The design flexibility of OLED is unmatched. #ProductDesign #FoldablePhones 5. Improved Power Efficiency (With a Catch) In certain scenarios, OLED displays can be more power-efficient than their LCD counterparts. Because OLED pixels generate their own light, a predominantly dark image requires very little power, as most of the pixels are turned off or dimmed. This is why "Dark Mode" on an OLED smartphone actually saves battery life. However, displaying a mostly white, bright image (like a word processing document or a snow-covered landscape) requires all pixels to be fully illuminated, which can draw significantly more power than an LCD displaying the same image. #EnergyEfficiency The Inherent Challenges: Burn-in, Lifespan, and Costs Despite its many incredible advantages, OLED technology is not perfect. It faces several significant challenges that manufacturers have been working tirelessly to mitigate. Understanding these limitations is crucial for anyone considering investing in an OLED device. #TechProblems 1. The Threat of Burn-In The most widely discussed issue with OLED displays is the risk of "burn-in," also known as permanent image retention. Because each pixel generates its own light, pixels that are used more frequently or driven at higher brightness levels will degrade faster than pixels that are used less. Over time, this uneven degradation can result in a faint, permanent ghost image of static elements that have been displayed on the screen for long periods. #OLEDburnin For example, if you watch a news channel with a static logo in the corner for many hours a day, the pixels displaying that logo may degrade faster than the rest of the screen, leaving a permanent shadow of the logo even when you change the channel. The same applies to HUDs (Heads-Up Displays) in video games or the taskbar on a computer monitor. Manufacturers have implemented various software and hardware mitigation strategies to combat burn-in. These include "pixel shifting" (imperceptibly moving the image by a few pixels periodically to distribute wear), automatic logo dimming, and "pixel refresher" routines that run when the display is turned off to even out pixel wear. While these features have significantly reduced the risk of burn-in under normal usage conditions, it remains a concern for extreme use cases, such as using an OLED screen as a dedicated PC monitor with static toolbars. #TechTips 2. Lifespan and the "Blue Pixel Problem" The organic materials used in OLEDs degrade over time, which means the overall brightness of the display will gradually decrease as it ages. However, not all colors degrade at the same rate. Historically, the organic materials used to produce blue light have been significantly less efficient and have had a shorter lifespan than the red and green materials. To compensate for this "blue pixel problem," manufacturers have had to drive the blue pixels harder to achieve color balance, which only accelerates their degradation. This uneven aging can lead to a shift in color balance over the lifespan of the device. While continuous advancements in material science have drastically improved the longevity of blue OLED materials, achieving parity with red and green remains an ongoing area of research. #MaterialsEngineering 3. Manufacturing Complexity and Cost Manufacturing OLED panels, particularly large ones for televisions, is a highly complex and delicate process. The organic materials are extremely sensitive to moisture and oxygen, requiring them to be deposited and sealed in meticulously controlled vacuum environments. Even tiny imperfections or contaminants can result in defective pixels or entire panel failures. This manufacturing complexity historically resulted in low yield rates (the percentage of usable panels produced) and high production costs. While manufacturing techniques have vastly improved and economies of scale have brought prices down considerably, OLED displays still generally carry a premium price tag compared to traditional LCD panels. #Manufacturing #SupplyChain 4. Brightness Limitations While OLEDs offer infinite contrast due to their perfect blacks, they have traditionally struggled to reach the peak brightness levels achievable by the brightest high-end LED-backlit LCD TVs (often referred to as QLEDs or Mini-LEDs). To protect the organic materials from premature degradation and burn-in, OLED panels employ an Automatic Brightness Limiter (ABL) that dims the screen when a large portion of it is displaying bright white. While modern OLEDs are more than bright enough for typical indoor viewing, they may not be the optimal choice for incredibly sunlit rooms where sheer brightness is required to combat glare. #HomeCinema Applications: Beyond TVs and Smartphones When we think of OLED, smartphones and high-end televisions are the first devices that come to mind. These two markets have indeed driven the mass commercialization of the technology. Companies like Samsung Display dominate the small-to-medium OLED market (smartphones, tablets, smartwatches), while LG Display has been the primary champion of large-format OLED panels for TVs. #Smartphones #ConsumerElectronics However, the unique properties of OLED—its thinness, flexibility, and vibrant colors—have enabled its application in a much broader range of industries. 1. Wearable Technology: The low power consumption of OLED (particularly when displaying dark UI themes) and its ability to be shaped make it perfect for smartwatches and fitness trackers. Devices like the Apple Watch rely on OLED screens to provide clear, vibrant displays that conform to the curve of the wrist. #Wearables 2. Automotive Displays: The automotive industry is rapidly adopting OLED technology for digital dashboards, infotainment systems, and even exterior lighting. The high contrast ensures readability in varying lighting conditions, and the flexibility allows designers to integrate screens seamlessly into the curved contours of a car's interior. Furthermore, OLED taillights offer unique, customizable lighting signatures that improve visibility and aesthetics. #AutomotiveTech #CarDesign 3. Virtual Reality (VR) and Augmented Reality (AR): VR headsets require displays with incredibly fast response times to prevent motion sickness and high pixel densities to eliminate the "screen door effect." OLED's microsecond response times and excellent contrast make it a preferred technology for premium VR headsets. Micro-OLED displays, which are built on silicon wafers rather than glass substrates, offer massive pixel densities perfect for AR and VR applications. #VirtualReality #AugmentedReality 4. Lighting Applications: Beyond displays, OLED technology is also being used for general illumination. OLED lighting panels produce a soft, diffuse, and glare-free light that is pleasing to the eye. Because they are thin, flat, and generate very little heat, they can be integrated into walls, ceilings, and furniture in ways that traditional bulbs cannot. While currently an expensive niche, OLED lighting has the potential to revolutionize architectural and interior lighting design. #LightingDesign #Architecture The Future of OLED and Beyond: QD-OLED and MicroLED The display industry never stands still, and OLED technology is continuously evolving to address its limitations and push the boundaries of visual performance. #FutureTech #Innovation One of the most significant recent advancements is the development of QD-OLED (Quantum Dot OLED) technology. Traditional OLED TVs (specifically those manufactured by LG Display, known as WRGB OLED) use white OLED pixels combined with color filters to produce red, green, and blue light. While effective, the color filters block a significant amount of light, limiting peak brightness and color volume. QD-OLED, pioneered by Samsung Display, takes a different approach. It uses a blue OLED emissive layer as the light source. To create red and green light, the blue light is passed through a layer of Quantum Dots—nanocrystals that absorb the blue light and re-emit it as incredibly pure red or green light. Because quantum dots are highly efficient and do not rely on absorptive color filters, QD-OLED panels can achieve significantly higher peak brightness and a much wider, more vibrant color gamut than traditional WRGB OLEDs. #QuantumDots #QDOLED Another exciting development is the push towards PHOLED (Phosphorescent OLED). Currently, most commercial OLED displays use fluorescent materials for the blue subpixels. Fluorescent materials are inherently inefficient, converting only about 25% of electrical energy into light, with the rest lost as heat. Phosphorescent materials, on the other hand, can achieve nearly 100% internal quantum efficiency. While red and green PHOLED materials have been used for years, developing a stable, long-lasting blue PHOLED has proven incredibly difficult. However, major breakthroughs have been announced recently, and the commercialization of blue PHOLED is expected in the near future. This will drastically improve the power efficiency and brightness of all OLED displays. #PHOLED While OLED continues to evolve, it is also facing a formidable challenger on the horizon: MicroLED. Like OLED, MicroLED is a self-emissive technology where each pixel generates its own light. However, instead of using organic compounds, MicroLED uses microscopic inorganic LEDs (typically gallium nitride). Because it uses inorganic materials, MicroLED theoretically offers all the advantages of OLED (perfect blacks, infinite contrast, fast response times) without any of the drawbacks. Inorganic LEDs are immune to burn-in, do not degrade over time in the same way organic materials do, and can be driven to incredibly high brightness levels far exceeding anything an OLED can produce. The challenge with MicroLED lies in manufacturing. A 4K display requires over 24 million individual microscopic LEDs (8 million pixels x 3 subpixels each) to be flawlessly manufactured and transferred onto a backplane. This process, known as "mass transfer," is incredibly difficult, slow, and expensive to perform at scale. While massive, extremely expensive MicroLED displays currently exist for commercial applications (like Samsung's "The Wall"), it will likely be many years before MicroLED can be cost-effectively manufactured for consumer smartphones and televisions. Until then, OLED remains the undisputed king of consumer display technology. #MicroLED #NextGenDisplays Conclusion: A Bright and Flexible Horizon From its humble beginnings in research laboratories to its current status as the pinnacle of consumer display technology, OLED has undergone a remarkable journey. It has fundamentally shifted our expectations of what a screen should look like, proving that deep, inky blacks and vibrant, lifelike colors are not just luxury features, but essential components of an immersive visual experience. #TechEvolution While challenges like burn-in and manufacturing costs remain, the continuous pace of innovation—evidenced by advancements like QD-OLED and the imminent arrival of blue PHOLED materials—suggests that OLED's best days are still ahead. It is a technology that has freed screens from the rigid confines of glass and backlights, allowing them to bend, fold, and conform to our lives in entirely new ways. As we look toward the future, whether it's through the lens of an ultra-thin smart TV, the folding screen of a pocket-sized communicator, or the immersive visor of a VR headset, it is clear that organic light-emitting diodes will continue to illuminate our path forward. The revolution is televised, and its pixels are glowing brighter than ever. #TheFutureIsBright #OLEDRevolution Related InsightsFlash Forward: Navigating the QLC‑to‑PLC Transition in Modern SSDs The Rise of Liquid Neural Networks: Adapting AI for Real-Time Dynamic Environments Beyond the Electron: Harnessing the Power of Photons for Optical Computing{ "@context": "https://schema.org", "@type": "FAQPage", "mainEntity": [ { "@type": "Question", "name": "What is the main focus of The Future is Illuminating: A Deep Dive into OLED Technology?", "acceptedAnswer": { "@type": "Answer", "text": "Explore the fascinating world of OLED technology, from its fundamental workings to its impact on displays, lighting, and the future of electronics." } }, { "@type": "Question", "name": "Who authored the comprehensive guide on The Future is Illuminating: A Deep Dive into OLED Technology?", "acceptedAnswer": { "@type": "Answer", "text": "This detailed article and its insights were carefully researched and authored by John Doe." } }, { "@type": "Question", "name": "Where can I find more related content about Technology?", "acceptedAnswer": { "@type": "Answer", "text": "You can explore more articles, detailed reviews, and similar insights by browsing the Related Insights section at the bottom of this article or visiting our dedicated Technology category page." } } ] }
-
 John Doe
 - 14 Jun, 2026 10:00
The Ultimate Guide to Custom PC Building: Forging Your Digital Masterpiece
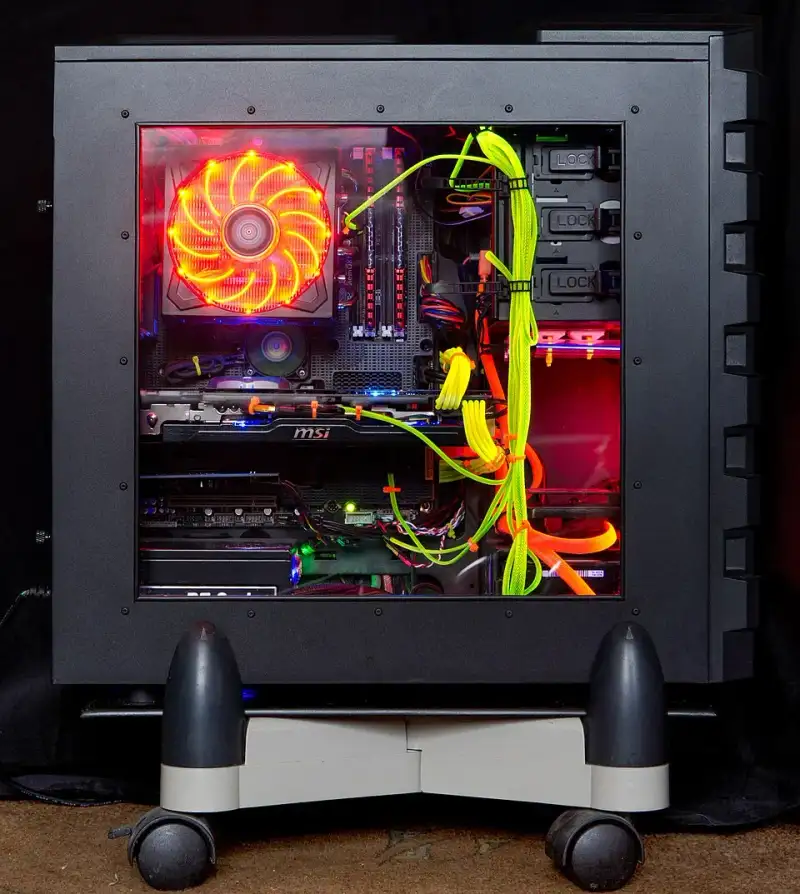
In an age where technology is seamlessly integrated into every facet of our daily lives, there is a profound, almost magical satisfaction in understanding the inner workings of the machines we rely on. For many, a computer is merely a black box—a mysterious monolith that magically renders video games, crunches massive datasets, and connects us to the global village. But for the initiated, a personal computer is not something you simply buy; it is something you craft. Welcome to the world of custom PC building, a realm where technology meets personal expression, and where a pile of cardboard boxes transforms into a digital powerhouse tailored exactly to your needs. #CustomPC #PCMasterRace #TechEnthusiast Building your own computer from scratch is an empowering experience. It demystifies the technology, removing the veil of corporate branding and proprietary constraints. When you build your own rig, you dictate the rules. You choose the exact balance of performance, aesthetics, and acoustics. You are no longer tethered to the questionable configuration choices or pre-installed bloatware of major manufacturers. More importantly, building a PC is fundamentally a rite of passage for any true technology enthusiast. It teaches patience, meticulousness, and problem-solving. In this extensive guide, we will journey together through the entire process of custom PC building—from the initial conceptualization and component selection to the intricate dance of assembly and the final, triumphant press of the power button. #DIYComputer #BuildYourOwnPC The Anatomy of a Personal Computer Before you can assemble your dream machine, you must first understand the purpose of each component. Think of a computer as a digital organism. Each part plays a specific, critical role in keeping the system alive and functioning efficiently. The Central Processing Unit (CPU) The CPU is the undisputed brain of your computer. It is responsible for executing instructions, performing calculations, and coordinating the activities of all other components. Whether you are browsing the web, compiling code, or calculating complex physics in a modern video game, the CPU is the maestro directing the orchestra. When selecting a CPU, you will look at metrics like core count, thread count, and clock speed. Modern processors from giants like Intel and AMD offer an incredible range of options, from budget-friendly quad-core chips to monstrous multi-core behemoths designed for heavy productivity workloads. Choosing the right CPU sets the foundation for your entire build. #CPU #Processor #Intel #AMD The Motherboard If the CPU is the brain, the motherboard is the nervous system. It is the central printed circuit board that connects all your components together, allowing them to communicate and share power. Motherboards come in various form factors—such as ATX, Micro-ATX, and Mini-ITX—which dictate the size of the computer case you will need. Beyond size, motherboards offer a myriad of features including built-in Wi-Fi, premium audio codecs, massive power delivery systems for overclocking, and multiple slots for expanding your storage. The motherboard also dictates which generation of CPU and RAM you can use, making it a critical choice that determines your system's upgrade path. #Motherboard #PCComponents #TechHardware Random Access Memory (RAM) RAM acts as your computer's short-term memory. Whenever you open an application, load a game level, or edit a photograph, the CPU pulls the necessary data from your long-term storage and places it into the RAM for lightning-fast access. Without enough RAM, your system will constantly swap data back and forth from your slower storage drive, resulting in stuttering and lag. In today's computing landscape, 16GB of DDR4 or DDR5 RAM is considered the standard sweet spot for most users, while power users and heavy gamers often opt for 32GB or even 64GB to ensure seamless multitasking and performance. #RAM #PCMemory #DDR5 The Graphics Processing Unit (GPU) For gamers, 3D artists, and video editors, the GPU is the most important and often the most expensive component in the build. While the CPU handles general calculations, the GPU is a specialized processor designed exclusively to render graphics and accelerate specific workloads. A powerful graphics card translates raw data into the beautiful, high-resolution, high-framerate visuals you see on your monitor. Features like real-time ray tracing and AI-driven upscaling (such as NVIDIA's DLSS or AMD's FSR) have made modern GPUs incredibly complex and capable. #GPU #GraphicsCard #NVIDIA #Radeon #GamingSetup Storage Solutions (SSD vs. HDD) Storage is the long-term memory of your computer, where your operating system, applications, and files reside permanently. Historically, Hard Disk Drives (HDDs) with spinning magnetic platters were the norm. Today, Solid State Drives (SSDs) have completely revolutionized the landscape. Specifically, NVMe M.2 SSDs, which plug directly into the motherboard and use the PCIe interface, offer read and write speeds that are exponentially faster than traditional SATA drives. A fast SSD means your computer boots up in seconds, games load almost instantly, and the entire operating system feels incredibly snappy and responsive. #SSD #NVMe #PCStorage The Power Supply Unit (PSU) Often overlooked but absolutely vital, the PSU is the heart of your computer. It takes the alternating current (AC) from your wall outlet and converts it into the stable direct current (DC) required by your components. A cheap, unreliable power supply can literally destroy your entire system if it fails. When choosing a PSU, you must consider the total wattage required by your parts (with a healthy overhead margin), the efficiency rating (such as 80 Plus Gold or Platinum), and whether you want a modular design, which allows you to plug in only the cables you need, drastically improving the cable management process. #PowerSupply #PSU #TechSafety Cooling Systems Computer components, especially the CPU and GPU, generate a tremendous amount of heat. If this heat is not dissipated effectively, the parts will automatically slow themselves down (thermal throttling) to prevent damage, or worse, shut down completely. CPU coolers come in two main varieties: air coolers and liquid coolers (AIOs). Air coolers use a block of metal fins and a fan to blow the heat away, offering excellent reliability. Liquid coolers use a pump, tubes, and a radiator to transfer heat away from the CPU, often providing better cooling capacity and a cleaner aesthetic. In addition to the CPU cooler, your case will need intake and exhaust fans to maintain a steady flow of fresh, cool air throughout the chassis. #PCCooling #WaterCooling #AirCooling The Chassis (Case) The case is the skeleton and the skin of your computer. It holds all the components in place, dictates the airflow paths, and defines the visual identity of your build. Cases come in all shapes and sizes, from massive full-tower monoliths with tempered glass side panels to ultra-compact Small Form Factor (SFF) enclosures that can fit in a backpack. A good case will offer excellent airflow, intuitive cable management channels, and plenty of space for your specific components. #PCCase #PCMods #SetupInspiration Planning, Budgeting, and the Art of Balance The journey of custom PC building begins long before you touch a screwdriver. It starts with planning. The most common mistake new builders make is mismatched components—creating a system where one part significantly holds back the performance of the others, a phenomenon known as a bottleneck. For instance, pairing a top-of-the-line $1,500 graphics card with a budget $100 processor will result in the GPU waiting idly for the CPU to send it instructions. Conversely, a high-end CPU paired with a weak GPU will result in poor gaming performance, as the graphics card struggles to render frames fast enough. Achieving a balanced build requires research and a clear understanding of your use case. Are you building an esports machine focused on 1080p high-refresh-rate gaming? Are you a video editor who needs massive multi-core performance and terabytes of fast storage? Or are you aiming for a 4K living room gaming console replacement? Budgeting is equally critical. It is easy to get caught up in the marketing hype and overspend on features you don't need. Establishing a hard budget and allocating funds proportionally is a skill. Generally, for a gaming PC, the GPU should consume about 40% to 50% of your total budget. Tools like PCPartPicker are invaluable during this phase; they allow you to compile a virtual list of components, automatically flag compatibility issues, and track price changes across various retailers. #PCPartPicker #TechBudget #PCSetup The Preparation and Workspace Once the components arrive, it is tempting to rip open the boxes and start shoving parts together. However, preparation is key to a smooth and stress-free build process. First, prepare your workspace. You need a large, clean, well-lit table. Avoid building on carpet, as the static electricity generated by your socks rubbing on the floor can theoretically discharge into sensitive electronic components and damage them. While modern PC parts are surprisingly resilient to Electrostatic Discharge (ESD), it is always best practice to ground yourself occasionally by touching a large metal object or by wearing an anti-static wristband. Gather your tools. You only really need one tool: a high-quality, medium-sized Phillips-head screwdriver (ideally magnetized, to prevent tiny screws from falling into the dark crevices of your case). Having some zip-ties or Velcro straps on hand for cable management, a pair of flush cutters, and a small flashlight will also make your life significantly easier. #PCWorkspace #TechPrep #DIYSetup The Assembly Process: A Step-by-Step Journey Building a PC is essentially assembling expensive, high-tech Lego blocks. The connectors are standardized, and generally, things only fit where they are supposed to go. Phase 1: The Out-of-Case Build The smartest way to start is by assembling the core components on the motherboard before placing it inside the case. The motherboard box serves as an excellent, non-conductive test bench. First, install the CPU. Unlatch the socket on the motherboard, gently align the golden triangle on the corner of the CPU with the corresponding triangle on the socket, and drop it in. It should require zero force. Lock the retention arm in place. Next, install the RAM. Push down the clips at the ends of the RAM slots, line up the notch on the memory stick with the ridge in the slot, and press down firmly until the clips snap back into place with a satisfying click. Finally, install your M.2 NVMe SSD. Slide the drive into the tiny M.2 slot at a 30-degree angle, push it flat, and secure it with the minuscule screw provided with your motherboard. With these three components installed, you have completed the most delicate part of the build. #PCAssembly #TechDIY Phase 2: The Motherboard Migration Now, prepare the case. Lay it flat on its side. Ensure that the motherboard standoffs (the little metal pegs that keep the back of the motherboard from touching the metal case and shorting out) are installed in the correct positions for your motherboard size. If your motherboard does not have a pre-installed I/O shield, snap the metal I/O shield into the rectangular cutout at the rear of the case. (Be warned: the edges can be surprisingly sharp!). Carefully lower the motherboard into the case, aligning the rear ports with the holes in the I/O shield and the screw holes with the standoffs. Secure the motherboard with screws, working in a star pattern to ensure even pressure. #MotherboardInstallation Phase 3: Wiring and Power Install the Power Supply Unit into its designated shroud, usually at the bottom of the case. Now begins the meticulous task of cable management. Route the massive 24-pin ATX power cable from the back of the motherboard tray and plug it firmly into the right side of the motherboard. Route the 8-pin EPS CPU power cable to the top-left corner. Next, tackle the front panel connectors. These tiny, individual wires connect the case's power button, reset switch, and indicator LEDs to the motherboard. They are notoriously frustrating to plug in due to their size, so consult your motherboard manual closely. Plug in the front panel USB and HD Audio cables as well. #CableManagement #PCWiring Phase 4: The GPU and Final Touches The final major component is the graphics card. Remove the PCIe slot covers on the back of the case. Push down the locking clip on the top PCIe x16 slot on the motherboard. Carefully align the GPU and press it firmly into the slot until the clip snaps closed. Secure the heavy card to the case chassis using screws to prevent sagging. Finally, run the necessary PCIe power cables from the PSU to the GPU. Double-check every connection. Ensure all fans are plugged into the appropriate fan headers on the motherboard. Take a moment to tidy up the cables in the back using zip ties. A clean build not only looks better but also promotes better airflow. #GraphicsCardInstall #CleanSetup The First Boot and BIOS Configuration The physical assembly is complete, but the psychological climax of the build is the First Boot. Plug in the power cable, flip the switch on the back of the PSU, connect your monitor, keyboard, and mouse, and press the power button on the front of the case. If all goes well, the fans will spin up, the RGB lights (if you have them) will illuminate, and a few seconds later, your monitor will display the motherboard manufacturer's logo and ask you to press a key to enter the BIOS (Basic Input/Output System). This is the moment of immense relief and pride. If nothing happens, do not panic. 90% of the time, a failed boot is due to a loose cable, RAM not seated completely, or the power switch simply not being turned on. Once in the BIOS, your first task is to verify that all your components are recognized. Check the CPU temperature to ensure the cooler is mounted properly. Next, enable XMP (Extreme Memory Profile) or EXPO for your RAM; without this, your memory will run at a sluggish base speed rather than the fast speed you paid for. Adjust your fan curves if you want a quieter system, and set your boot priority to the USB flash drive containing your operating system installation media. #BIOS #FirstBoot #TechSuccess Operating System and Software Optimization With the hardware finalized, it is time to give your computer a soul. Insert your Windows or Linux installation USB, save your BIOS settings, and restart. The installation process is straightforward, guiding you through partitioning your drive and setting up user accounts. Once you arrive at the desktop, your job is not quite done. Your computer will look a bit strange initially because it is using generic display drivers. The first order of business is to download and install the latest drivers for your motherboard chipset and, most importantly, your GPU. These drivers are the specialized software that allows your operating system to utilize the hardware fully. Run Windows Update repeatedly until there are no more updates left. Download hardware monitoring software like HWMonitor to keep an eye on your system temperatures under load. Finally, download the software necessary to control any RGB lighting in your system, allowing you to synchronize the colors and effects to match your personal aesthetic. #Windows11 #LinuxGaming #PCSetup Conclusion Custom PC building is a magnificent convergence of engineering, logic, and art. It transforms the act of computing from a passive consumer experience into an active, creative endeavor. The machine humming quietly on your desk is no longer just a tool; it is a manifestation of your research, your budget, and the careful labor of your own hands. The beauty of a custom PC is that the journey never truly ends. In a few years, when new games demand more graphical horsepower, you don't need to throw the whole computer away. You simply unclip the old GPU, slot in a new one, and your masterpiece is reborn, ready to tackle the future. Whether you are building an ultra-budget workstation for studying or a liquid-cooled powerhouse that rivals supercomputers of the past, the knowledge and satisfaction gained from building your own custom PC is an invaluable reward. Happy building! #TechEnthusiast #CustomPCBuild #MasterRace #HardwareJourney #PCBuilding #CustomPC #Hardware #GamingSetup Related InsightsRevolutionizing Archival Systems: The Future of DNA Data Storage The Art of Tech Reviewing: A Comprehensive Guide to Mastering the Craft The Algorithmic Canvas: How AI-Generated Art is Redefining Creativity, Ownership, and the Future of Digital Expression{ "@context": "https://schema.org", "@type": "FAQPage", "mainEntity": [ { "@type": "Question", "name": "What is the main focus of The Ultimate Guide to Custom PC Building: Forging Your Digital Masterpiece?", "acceptedAnswer": { "@type": "Answer", "text": "A comprehensive and engaging guide to building your own custom PC from scratch, covering components, assembly, and optimization." } }, { "@type": "Question", "name": "Who authored the comprehensive guide on The Ultimate Guide to Custom PC Building: Forging Your Digital Masterpiece?", "acceptedAnswer": { "@type": "Answer", "text": "This detailed article and its insights were carefully researched and authored by John Doe." } }, { "@type": "Question", "name": "Where can I find more related content about Technology?", "acceptedAnswer": { "@type": "Answer", "text": "You can explore more articles, detailed reviews, and similar insights by browsing the Related Insights section at the bottom of this article or visiting our dedicated Technology category page." } } ] }